Nexsel Tech

Indoor-Farming-in-New-Zealand

20
Jun

Indoor Farming in New Zealand: A Complete Guide to Growing Food Indoors All Year Round

Indoor farming is rapidly transforming agriculture in New Zealand. With changing climates, rising land prices, and a growing population, the demand for sustainable, space-efficient, and year-rund food production methods is higher than ever. Whether you’re a commercial grower or an enthusiastic hobbyist, indoor farming offers a smart and innovative way to grow fresh vegetables, herbs, fruits, and even microgreens—all without needing a backyard. In this comprehensive guide, we’ll explore what indoor farming is, how it’s gaining popularity in New Zealand, and how you can set up a successful system using LED grow lights, hydroponics, vertical farming techniques, and smart controls. What is Indoor Farming? Indoor farming, also known as controlled environment agriculture (CEA), is the practice of growing crops inside buildings using technologies like: LED grow lights Hydroponics or aeroponics systems Climate control Vertical farming racks Automated irrigation Unlike traditional farming, indoor farming allows you to control light, temperature, humidity, CO₂, and nutrients to create the perfect environment for plant growth. Why Indoor Farming is Gaining Momentum in New Zealand New Zealand’s agriculture sector is iconic, but it also faces challenges like: Land scarcity in urban areas Changing weather patterns High water usage Rural-to-urban shift of workforce As a result, urban farming and indoor agriculture are becoming viable solutions, especially in cities like Auckland, Wellington, and Christchurch. New Zealand’s clean energy and advanced agritech infrastructure further support this evolution. Top Benefits of Indoor Farming 1. Year-Round Crop Production Indoor farms are not weather-dependent. Whether it’s winter in Christchurch or heavy rains in Auckland, your crops continue to grow. 2. Saves Space With vertical farming setups, you can grow 10x more in the same area using stacked racks and efficient lighting. 3. Water Efficiency Hydroponics uses up to 90% less water than traditional soil farming, which is a game-changer in regions with water restrictions. 4. Pest and Disease Control Controlled indoor environments significantly reduce pest infestations and eliminate the need for harmful pesticides. 5. Proximity to Market You can grow and supply food directly in urban centres, reducing transportation costs and carbon footprint. Core Technologies Used in Indoor Farming 1. LED Grow Lights (Full-Spectrum) LED grow lights are crucial for indoor farming in NZ where natural light may be limited. Look for: Full-spectrum LED lights to mimic sunlight High PAR values for faster growth Energy-efficient models to reduce power costs Popular NZ keyword: LED grow lights for indoor farming NZ 2. Hydroponics Systems Hydroponics is a soil-free growing method using water mixed with nutrients. Systems include: Nutrient Film Technique (NFT) Deep Water Culture (DWC) Drip Systems Hydroponics is perfect for leafy greens, lettuce, basil, spinach, and strawberries. Popular NZ keyword: Hydroponic farming NZ 3. Climate Control and Sensors To ensure optimal conditions: Use humidity & temperature sensors Install automated exhaust systems Use timers and smart apps to control light cycles and watering 4. Vertical Farming Racks These modular shelving systems are ideal for maximizing indoor space. Use aluminum frames and adjustable LED lights between layers for optimal plant access. Steps to Start Your Indoor Farm in New Zealand ✅ Step 1: Define Your Goals Commercial sale, home use, or educational purpose? Choose between leafy greens, herbs, microgreens, or exotic plants. ✅ Step 2: Choose a Suitable Indoor Space Spare room, garage, basement, shipping container, or commercial warehouse Ensure access to power and ventilation ✅ Step 3: Select a Lighting System Use LED grow lights with adjustable spectrums and timers Check local NZ suppliers for affordable options ✅ Step 4: Pick a Growing Method Hydroponics (most popular in NZ) Soil-based (if you’re just starting out) Aeroponics or aquaponics for advanced growers ✅ Step 5: Install Infrastructure Light fixtures Grow trays and racks Water tanks and pumps pH and EC meters Timer switches ✅ Step 6: Start Planting and Monitor Regularly Use seeds from reputable NZ suppliers Track plant growth, water usage, and light hours Harvest frequently and reinvest in scaling Indoor Farming Business Opportunities in New Zealand The indoor farming sector is booming. Here are some trending opportunities: Microgreen production for cafes and restaurants Basil, coriander, and lettuce supply for supermarkets Urban vertical farms in Auckland apartments Tissue culture propagation units Educational hydroponic kits for schools New Zealanders are increasingly choosing locally grown, pesticide-free produce, and indoor farming helps meet this demand. Common Challenges (And How to Overcome Them) Challenge Solution High electricity bills Use energy-efficient LED grow lights with auto shut-off timers Initial investment cost Start small with a DIY hydroponic kit and grow modularly Limited technical knowledge Join indoor farming communities and follow NZ-based agritech forums Mold or algae buildup Regularly clean reservoirs and ensure good airflow Finding the right nutrients Use NZ-certified hydroponic nutrient mixes for leafy greens and herbs Indoor Farming in New Zealand: Future Outlook New Zealand is well-positioned to become a leader in smart, sustainable indoor farming. The government’s interest in food security and sustainable agriculture is accelerating adoption. Agritech companies and startups are exploring AI, IoT, and automation to further improve yield and reduce manual efforts. With smart LED lighting, efficient hydroponic systems, and a growing community of indoor growers, now is the perfect time to invest in indoor farming—whether as a business or a lifestyle. Conclusion Indoor farming isn’t just a trend—it’s the future of food production in New Zealand. From energy-efficient grow lights to smart hydroponic systems, the technology is here, and it’s more accessible than ever. Whether you’re a hobbyist or an aspiring commercial grower, you can start small, scale smart, and grow sustainably. Take the first step today. Embrace the freedom of growing food all year long—indoors, sustainably, and successfully.

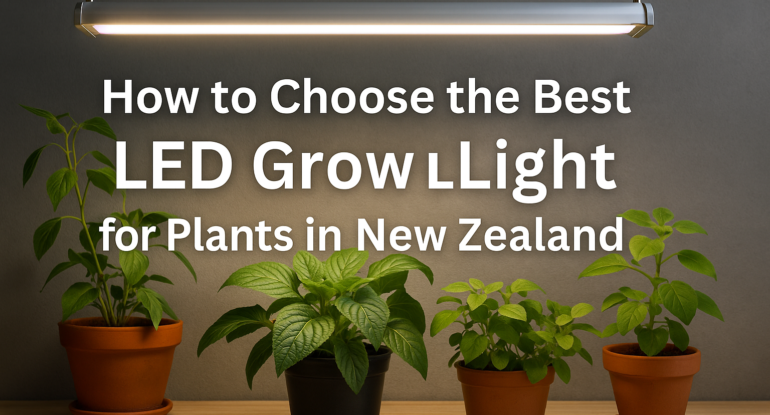
How to Choose the Best LED Grow Light for Plants in New Zealand (Beginner’s Guide)

06
May

How to Choose the Best LED Grow Light for Plants in New Zealand (Beginner’s Guide)

Introduction Indoor gardening and controlled-environment agriculture are booming in New Zealand. Whether you’re a hobbyist in Wellington, a commercial grower near Christchurch, or a research lab in Auckland, LED grow lights have become the gold standard for energy-efficient, high-yield plant cultivation. This beginner’s guide walks you through every consideration—from light spectrum and wattage to NZ-specific factors—so you can confidently choose the best LED grow light for your needs. “Lighting is the most critical factor in any indoor garden. Get it right, and your plants will reward you with faster growth and higher yields.” Why Choose LED Grow Lights? LED technology has revolutionized indoor growing. Here’s why Kiwi growers prefer LED grow lights over traditional options: Energy Efficiency: Up to 50–70% less power consumption than HPS or fluorescent lights. Tailored Spectrum: Full-spectrum white LEDs or red/blue combinations tuned for photosynthesis. Low Heat Output: Allows lights to sit closer to foliage, improving light penetration and reducing cooling costs. Longevity: Rated for 50,000+ hours of use—equivalent to 10+ years in many home setups. Compact & Scalable: Choose bars, panels, or bulbs to fit any space, from windowsills to vertical farms. These benefits translate to lower electricity bills—critical in NZ where commercial rates can exceed NZD 0.25/kWh—and healthier, faster-growing plants. Key Factors When Selecting an LED Grow Light 3.1 Light Spectrum (PPFD & PAR) Photosynthetically Active Radiation (PAR): 400–700 nm wavelengths drive photosynthesis. PPFD (μmol/m²/s): Measures how many photons hit your canopy each second. Seedlings/Clones: 100–200 μmol/m²/s Vegetative Growth: 300–600 μmol/m²/s Flowering/Fruiting: 600–900 μmol/m²/s Spectrum Options: Full-spectrum white LEDs for balanced growth Dual-spectrum red/blue for energy-efficient veg/flower cycles Tunable LEDs let you adjust spectrum by growth stage 3.2 Wattage vs. Efficiency Actual Power Draw (W): How much electricity the fixture uses. PPE (μmol/J): Efficiency metric—higher means more light per watt. Look for > 2.2 μmol/J for commercial-grade bars/panels. Home hobbyists can use 1.8–2.0 μmol/J fixtures. 3.3 Coverage Area & Penetration Footprint: The area (in m²) a light effectively covers at recommended hang height. e.g. a 600 W panel might cover 1.2 × 1.2 m at 30 cm above canopy. Light Uniformity: Even PPFD across the canopy avoids hotspots/low zones. Penetration: High canopy penetration ensures lower leaves get enough light. 3.4 Heat Output & Thermal Management Passive Cooling (Heatsinks): Silent but less efficient at high loads. Active Cooling (Fans): Better for high-power fixtures, but generates noise. Ambient Temperature: In summer months (Jan–Feb), NZ indoor temps can spike—good thermal design prevents heat stress. 3.5 Adjustability & Control Features Dimming: Allows precise intensity control for veg vs. bloom phases. Timers & Schedules: Built-in or external timers automate photoperiods. Wireless/App Control: Remote spectrum/intensity adjustments via smartphone. Types of LED Grow Lights 4.1 LED Bars Use Case: Vertical racks, tissue culture labs, narrow benches. Advantages: Slim form factor, easy daisy-chaining, uniform linear coverage. Example: 4 ft × 17 W LED Light Bars—ideal for leafy greens. 4.2 LED Panels Use Case: Commercial greenhouses, large tents, research chambers. Advantages: Broad coverage, high PPFD, modular design. Example: 600 W full-spectrum panel covering ~1.2 × 1.2 m. 4.3 COB & Quantum Board Lights Use Case: High-intensity small footprints, deep canopy penetration. Advantages: High lumen and photon output per diode, superior PPE. Example: 200 W COB combined with reflective optics for focused lighting. 4.4 Full-Spectrum vs. Adjustable Spectrum Fixed Full-Spectrum: Ready-to-use “white light”—simple and versatile. Tunable Spectrum: Separate veg/flower channels—maximizes efficiency per growth stage. Matching Lights to Your Plants 5.1 Seedlings & Clones Light Level: 100–200 μmol/m²/s Fixture Type: Low-wattage panels or LED bars; dimmable for tender plants. 5.2 Leafy Greens & Herbs Light Level: 300–500 μmol/m²/s Fixture Type: Full-spectrum panels or bars in hydroponic setups. Tip: Use multiple low-watt bars spaced evenly for uniform canopy. 5.3 Flowering & Fruiting Plants Light Level: 600–900 μmol/m²/s Fixture Type: High-power panels or COB clusters for penetration. Tip: Supplement with red-heavy spectrum during bloom phases. New Zealand–Specific Considerations 6.1 Seasonal Daylight Variations Winter (May–Aug): Short days (down to ~8 hours in South Island) Summer (Nov–Feb): Long daylight (up to ~15 hours) Strategy: Increase photoperiods and PPFD in winter to maintain growth rates. 6.2 Energy Costs & Efficiency Commercial Rates: NZD 0.20–0.30/kWh Home Rates: NZD 0.25–0.35/kWh (varies by region and provider) Tip: Choose fixtures with PPE > 2.0 μmol/J to minimize power bills. 6.3 Local Availability & Support Authorized Dealer: Growlight.co.nz stocks Nexsel Tech fixtures with NZ warranty. Support: Local tech support, replacement parts, and fast shipping across NZ. Installation & Maintenance Tips Height & Hangings: Seedling stage: 30–45 cm above canopy Veg stage: 30 cm Flower stage: 20–25 cm Photoperiod Scheduling: Veg: 16 hours on / 8 hours off Flower: 12 hours on / 12 hours off Cleaning: Dust LEDs and heatsinks bi-monthly to maintain output. Monitoring: Use PAR meter or smartphone apps to verify PPFD. Check leaf color and stretch for signs of light stress. Budgeting & Return on Investment Initial Investment: Hobbyist bar (9–17 W): NZD 50–150 each Commercial panel (300–600 W): NZD 600–1,200 Payback Period: With 20 % energy savings over HPS, many growers recoup costs within 12–18 months. Long-Term Savings: LEDs last 5–10× longer than HPS; reduced ballast replacement and cooling expenses. Use Case Recommended Fixture Key Specs Seedlings & Clones 2 ft LED Bar (9 W) 1.8 µmol/J, 100 µmol/m²/s, white spectrum Leafy Greens (Home Tents) 4 ft LED Bar (17 W) 2.0 µmol/J, 300 µmol/m²/s, daisy-chainable Small Indoor Gardens (Hobby) 200 W Quantum Board 2.2 µmol/J, full-spectrum Commercial Greenhouses 600 W Panel w/ Dimming & App Control 2.5 µmol/J, 1.2×1.2 m footprint Speed Breeding Chambers Tunable Dual-Spectrum Panel (450 W) 2.3 µmol/J, veg/bloom channels Tissue Culture Labs 36 W LED Tube (Replace 64 W CFL) 2.0 µmol/J, minimal heat All fixtures are available in New Zealand with local support and warranty from Growlight.co.nz. Conclusion & Next Steps Choosing the best LED grow light in New Zealand means balancing spectrum, wattage, coverage, and budget—while considering local energy costs and daylight patterns. By following this guide, you’ll be equipped to select a fixture that boosts plant health, maximizes yield, and delivers long-term

Our main products : Hydroponics grow light, tissue culture grow light , speed breeding, LED grow lights,  They feature with Energy Saving, Long Lifetime, Environment Friendly

Design & Developed By VBTEK

Nexel-Tech-Logo

Request A Call back

Nexsel is a research-driven horticultural lighting manufacturer that provides LED grow lights for biotech and horticulture purposes.

Enquire Now